Blog 6 (Project Development)
Hello Everyone!!!👋👋👋Welcome to my final blog where I will be documenting the project development for this module!!👀👀My group consist of Yu Han, Brice, Ji Hinn and me! We have been working on this project for quite a long time and finally we are done with it!!
3. Repeat the steps (1&2) 2 more times.
4. Click on the file icon at the top and click on save.
5. After you have saved the file, click on the same file icon again and press export and choose the file type as DXF and click on export.
For this project, we are required to use a lot of skills such as CAD, laser cutting, 3D printing, Arduino and a mechanism. Some of those we learnt from ICPD (CAD and 3D printing) and the rest we learnt from this module CPDD. I would say that it is definitely not easy to come up with an idea that contains all the required skills to build the product is such a short semester.
1. Our team Chemical Device
Chemical Device: Self-Sterilizing Door Handle
Background:
Door handles are a significant culprit in the spreading of viruses and bacteria. This is because everyone must touch them to open the door, and they rarely get cleaned since they do not look dirty to the naked eye. Also, most door handles are made of stainless steel, which is a perfect material for bacteria to cultivate on. Some examples of viruses that can spread are the coronavirus (COVID-19), norovirus, hand foot and mouth disease, and influenza.
To emphasize, ever since COVID-19 started, the need for sterilization tools/equipment/media to minimize its spread has increased. One of the commonly touched areas that requires specific sterilization equipment is door handles. Disinfecting and sterilizing are types of decontamination, a process that makes something safe to touch. The purpose is to kill enough germs so the risk of infection, in this case COVID-19, is extremely low.
Hence, our group has came up with a product called a self-sterilizing door handle that will automatically help to disinfect door handle via UV light after it has been touched. However, for safety measures, we will be substituting UV light with LED light for this project.
Hand Sketches of our product from Week 5 to Week 18
2. Team Planning, allocation, and execution
Chief Executive Officer (CEO): Devin Tan Wei Jie
Chief Financial Officer (CFO): Ang Yu Han
Chief Operating Officer (COO): Chang Ji Hinn
Chief Security Officer (CSO): Leong Rui Ren, Brice
Finalized BOM (Bill Of Material) Table
Finalized Gantt Chart
Task allocation:
Ji Hinn: Coding
Ji Hinn: Coding
Brice: 3D Printing
Devin: Laser Cutting
Yu Han: Prototype
3. Design and Build Process
Braining Storming Process:
As you can see from the many different types of sketch above, our group was really clueless on how to design this self-sterilizing door handle. Initially we wanted to replicate a similar door sterilizer we found online (Inspiration) therefore, the week 5 sketch looks almost similar to the chemical device shown in the video. However, the week 5 sketch did not include any power source for the UV light and the sensors required for the device to work, therefore, we added them a few weeks later (week 9) as we had our Mid Semester Test earlier.
Not gonna lie after we did the sketch during week 9, we did not progress until week 15 as we totally forgot about the project. As the CEO, I should have known better that we should at least progress a little every week so that we do not have to grind at the eleventh hour (which we did 😓😓). Therefore, for the next few weeks, you will be able to see many adjustment to our design as we had many fails. For week 15, we had a new sketch of our device with all the components needed to be in it but we totally forgot that we had to add a mechanism in our device such as gears, lever etc... Therefore, we had to think of an idea of how are we going to implement it into our device.
During week 16, our savior Brice came up with an idea to use a lever mechanism. How it works is that we will install the lever that is made of acrylic right below the door handle. When the door handle is pushed down to open the door, one side of the lever will be pushed downwards and the other side of the lever will tilt upwards. Then the lever that is tilting upwards will block the light dependent resistor causing the LED light to turn on. However, we realized that the device will not work as the person will have to keep his hand on the door handle for the LED light to shine and theoretically, letting UV light to shine on a person is unsafe as it might cause skin cancer. Therefore, we had to scrap off this idea.
For week 17, our group then came up with another idea of using an ultrasonic motion sensor instead. But before anything, I had to laser cut to fulfill the requirement for this project. I used the Creality Ender 3 to print our cylinder. After printing, we then took the rest of the week off to study for our EST.
The final week (18)!!😈 We met up after our EST to test our code and our product. Our code works but when we tried to fit everything into our cylinder, we realized that the wire was overextending out of the cylinder so we could not close using the lid. Therefore, we improvised and 3D print a hollow cylinder to glue it at the top so that everything fits. Our spring lever mechanism also did not work and we decided to scrap off that idea and use it without spring instead with a support glued underneath the lever. It surprisingly worked.
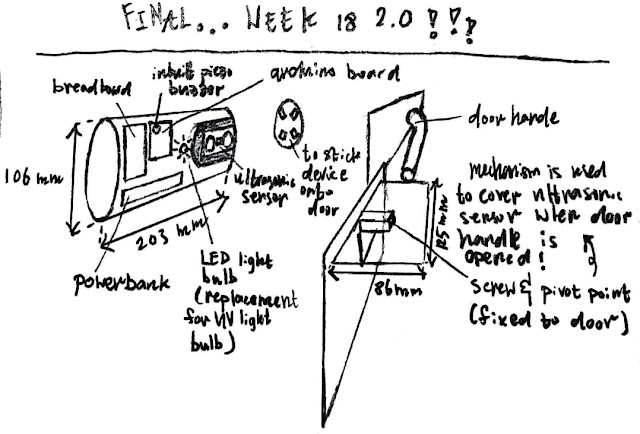
This is our final product sketch:
Part 1: Coding (Done by Ji Hinn)
Here's the link to Ji Hinn's Blog:
Ji Hinn's Hero Shot:
Part 2: 3D Printing (Done by Brice)
Here's the link to Brice's Blog:
Brice's Hero Shot:
Part 3: Laser Cutting (Done by Me)
My Contribution (Part 3):
Since our design needs to have a component that has to be laser cutted, I decided to take up the task for it. To be frankly honest, there is not much to do for laser cutting as we just need a small piece of acrylic to act as a lever as our mechanism! Therefore, I am able to finish my part relatively quickly so that I am assist my other groupmates in their parts if they need help.
For CAD, I just had to simply make a rectangle of dimension 13cm x 9cm. We decided to make 3 rectangles so that if we had any other ideas we can use the extra laser cutted acrylic as backup.
Let me walk you through the steps for fusion and how to do them:
1. Create sketch and find a 2-point rectangle and click it.
2. Choose any point you want to sketch and select dimension as 130mm by 90mm.
5. After you have saved the file, click on the same file icon again and press export and choose the file type as DXF and click on export.
6. After exporting, you can save it into your thumb drive and bring it to laser cut.
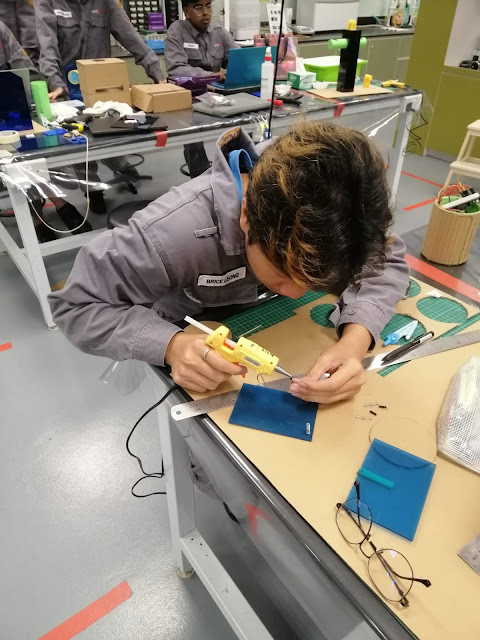
Some pictures of the laser cutting process:
Hero Shot with the product:
Apart from laser cutting, I also helped in the last part of coding where we had to include a buzzer sound whenever, the motion sensor detects a distance of less than 30cm. This is how I do it.
1. Open Arduino IDE, click on files > examples > 02.Digital > toneMelody
2. I changed the notes initially given by the example to C4 as I want a constant buzzer sound.
3. I then increase the number of integers for melody and noteDurations to increase the buzzer sounding time, the number of melody and noteDuration has to be the same.
4. I then insert this code under void loop so that it will constantly be playing when the ultrasonic motion sensor detects something within 30cm.
Last but not least, I created the hollow cylinder that was glued to the top of the previous cylinder as it was too short.
1. Click on center diameter circle and choose any point to sketch.
2. Create a diameter of 94mm and enter.
3. Create another circle with the same center as the previous circle but 100mm in diameter.
4. Click on Solid > Extrude and on the small annulus and extrude it by 60mm.
5. Save the file and export it to STL file type.
6. Open Cura and choose the file that you have exported.
7. Choose fast - 0.2mm and 10% infill and click slice.
8. Save to your removable disk and start printing.
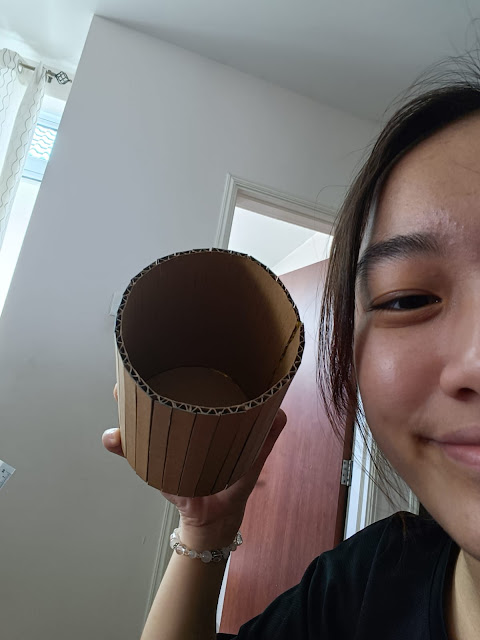
Part 4: Prototyping (Done by Yu Han)
Here's the link to Yu Han's Blog:
Yu Han's Hero Shot:
Part 5: Integration of All Parts and Electronics (Done by everyone)
We met in W3 after our End of Semester Test to put everything together. Firstly, we had to check that the code was working. While waiting for that we worked on our lever. After a while, our coder, Ji Hinn managed to get it done!
We then put everything into the cylinder and realized that the wire is too long so we had to 3D print a 6 cm hollow cylinder to fit the wire in our device to make it compact. We had to use hot glue to glue the extra 6cm hollow cylinder onto our previous 12.5cm cylinder. We also had a 1.8cm cover so our total device height is 20.3cm with a diameter of 10.6cm.
After managing to get all the component into our cylinder, its time to test our lever. We chose a random handle in W3 and stick our device onto the door and the lever below the door handle.
Final Product:
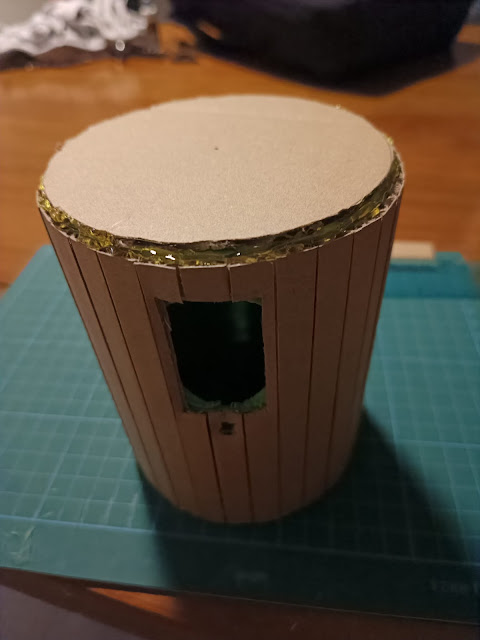
Here are some picture that we took during our building process:
Here is a timelapse video of us trying to put our components into our cylinder:
INTERNALS OF DEVICE!!
DEMONSTRATION OF DEVICE!!!
HERO SHOT WITH OUR DEVICE!!!
4. Problems and Solutions
In this section I will describe the problems our team have encountered in the design and build process and how we solved them.
5. Project Design Files as downloadable files
In this section, I will provide all the design files (Fusion360 files, .dxf files, .stl files, arduino programs files) as downloadable files.
6. Below is my Learning Reflection on the overall Project Development.
This chemical product prototyping process was a hassle. We had to juggle between our other modules and this project. Therefore, the Gantt chat we created is super important as it helps us to keep track on time and to be honest, we did not follow the Gantt chart which caused us to rush everything at the last minute but we managed to get it to work.
For this project, we are required to use a lot of skills such as CAD, laser cutting, 3D printing, Arduino and a mechanism. Some of those we learnt from ICPD (CAD and 3D printing) and the rest we learnt from this module CPDD. I would say that it is definitely not easy to come up with an idea that contains all the required skills to build the product is such a short semester.
Since I was in charge of laser cutting, I had to revised my SOP for the laser cutter as I had forgotten how to use the laser cutter. Thank goodness I have my classmate Jianye who had laser cut earlier in the day and he decided to help me. We entered FabLab and he guided me through the process. When I was in person at the laser cutter, I felt more familiar using it than I remembered. As I had laser cutted a few weeks ago, I definitely still remember how to operate it and I hope that in Y3 during our capstone project, I am still able to use the laser cut machine with ease.
Apart from laser cutting, I also learnt how to start up the 3D printer as in ICPD, whenever we had to use the 3D printer, it was already on and ready for use. When I came at 7.30am this time, everything was off and I had to learnt from scratch how to insert the filament, heat up the plate and so on. I learnt how to perform start up for both the Creality Ender 3 and Ultimaker S3. I am quite proud as I also helped students from other classes who arrived early and do not how to start up the 3D printer. They were like me the first time when I arrived early and somebody taught me how to perform start up so I had to return the favor and help somebody else. I also revised on my CAD when making the hollow cylinder.
Moreover, I learnt how to stay calm and adapt to changes during this project. When our wire overextended out of the cylinder, our group thought of making a new cylinder with longer height but that would take too long and we do not have time to 3D print a new cylinder that is 6h long as the lab is closing soon. Therefore, my team came up with an idea to 3D print a hollow cylinder and use hot glue gun to stick it at the top of the previous cylinder. It definitely take lesser time to 3D print and it also helps us to test our prototype sooner.
However, there are definitely room for improvement for me in this project. For example, as the CEO, I should be planning out the timeline for what should be done so that we do not need to cramp everything at the last minute. In addition, I should also speak up and offer help to my teammates during the project. I can also improve my communication skills during discussion sessions to chip in and give more ideas.
In conclusion, this experience was a fruitful one and I am blessed to have these teammates in my group. I would say we had the most fun during the last day where we finished our prototype as we relaxed at Brice's house afterwards and played some games together😆. I also managed to learnt some technical skills such as operating the 3D printer, recap on operating the laser cutter and my skills on CAD.
Before I end my reflection, I would like to thank my beloved team (Brice, Yu Han & Ji Hinn) for being so steady and calm throughout this rushed journey. I would like to thank Brice for coming up with amazing ideas such as the lever and letting us go to his house and use his door handle to test our prototype😘. I would also like to thank Yu Han for using her free time to make endless amount of cardboard prototype to see if our component will be able to fit in it 😙. Last but not least, I would like to thank Ji Hinn for finishing the code on time and made it work when we need it😘.
This concludes my final blog. See you next time.


.jpeg)


Comments
Post a Comment